 by
by 
If it happens you have a publicly available Spring Boot project hosted on GitHub and interested to know how to establish a Continuous Integration (CI) pipeline with Jenkins, this post is well-suited for you.
Having a CI pipeline in Jenkins with a Maven project, in this case, Spring Boot, is fairly easy. It can be done by installing a few Jenkins plugin and then build a new pipeline that whenever any commit is pushed to the project, Jenkins triggers the build process and runs all the tests to ensure the latest changes didn’t break anything.
To simplify the process, the steps are broken down and each explained in pictures.
Maven configuration
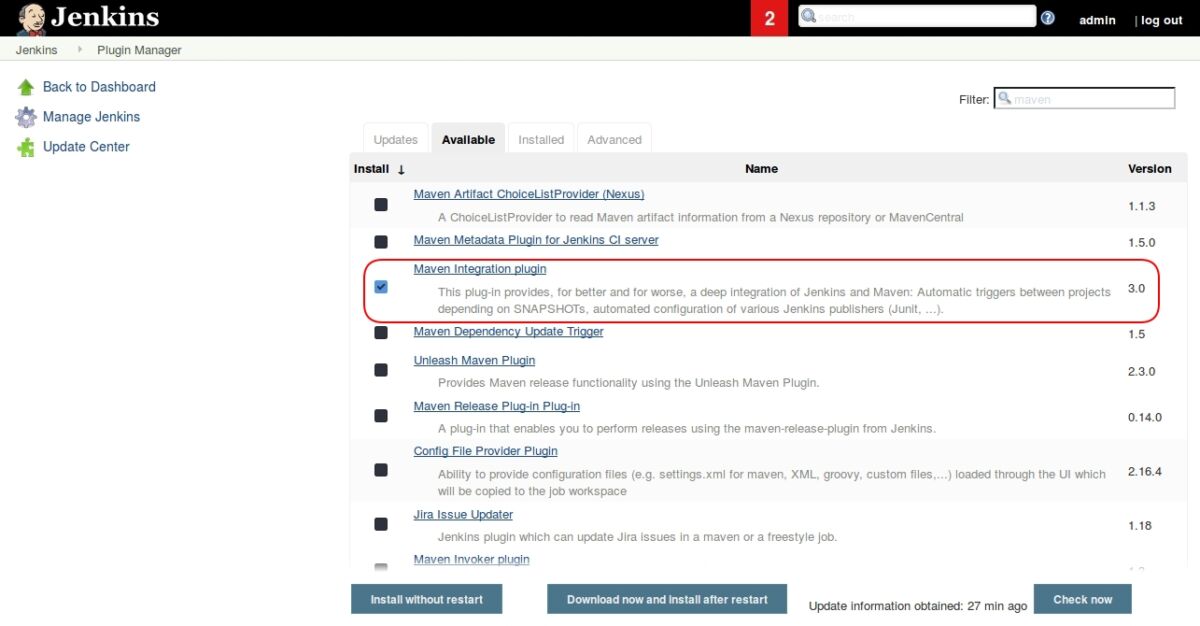
The first step is to install Maven Integration plugin. Simply just go to Manage Jenkins, click on Manage Plugins. Search for the plugin and click install like below picture:
Then go to /configureTools and scroll down to Maven section, click on Add Maven and then type a name and click save.

GitHub configuration
To be able to automatically trigger build on each push, need to create a hook to your GitHub repository. Here, the procedure is explained for public GitHub repositories. The private ones involve more steps. For that, I highly suggest referring to this Medium post.
Activating the hook has two parts.
- Installing
GitHub Integration Plugin - Add Jenkins
/github-hookURL to a GitHub project
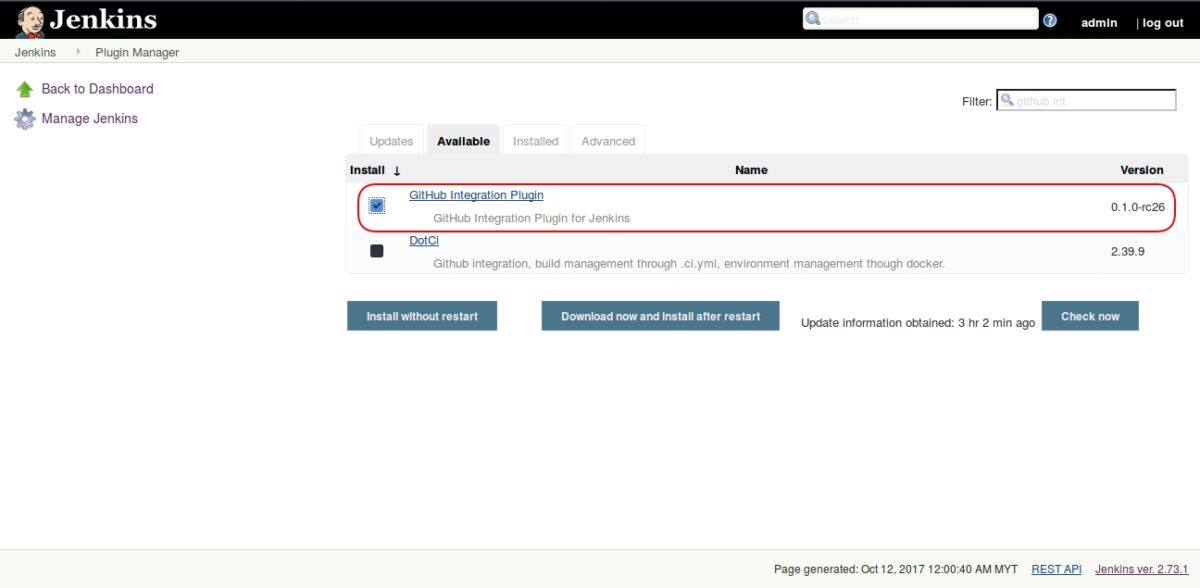
Installing GitHub plugin
It is fairly simple and similar to installing Maven plugin. Just go to Manage Plugins, search for GitHub Integration Plugin and proceed with the installation.
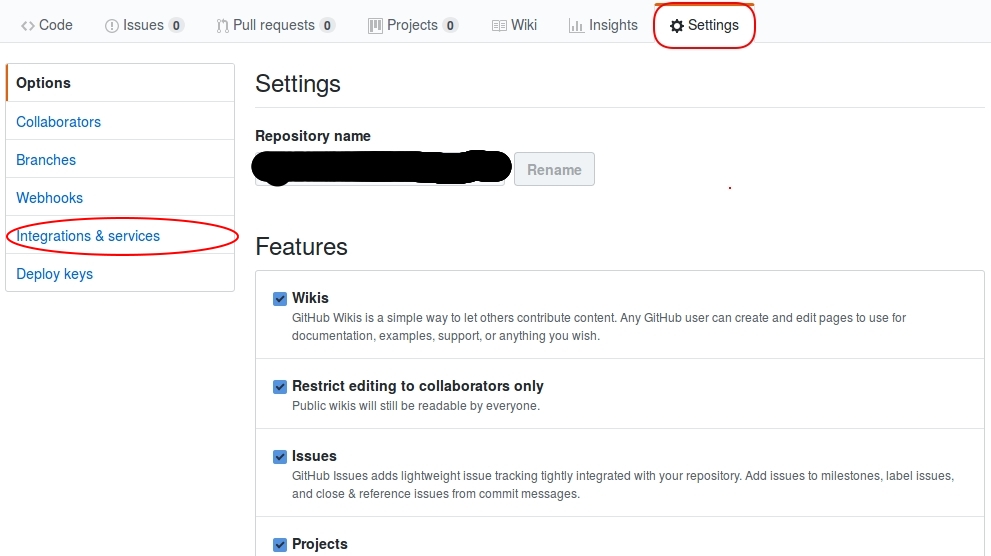
GitHub WebHook configuration
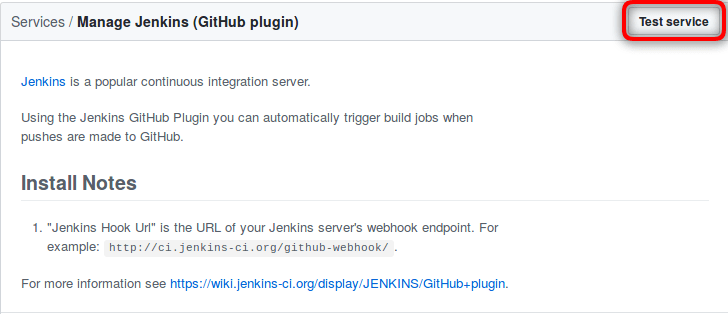
Go to a GitHub repository setting you want to establish CI for. Click on Integration & Services.
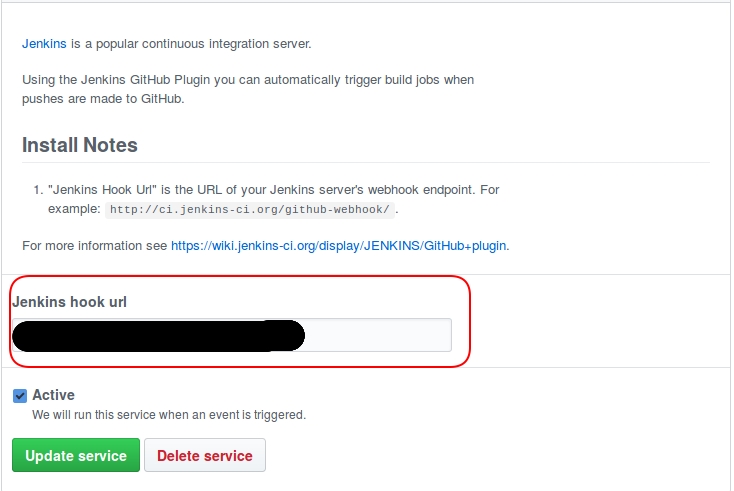
In Add service look for Jenkins (GitHub plugin). After that paste your Jenkins URL and click Update service.
Note: if you are running Jenkins on local still you can trigger remote WebHook by using a tool like ngrok or something similar that provides a unique URL to your local machine which is accessible across the Internet.
Keep the Github configuration page open, need to go back to it soon.
Creating and configuring a new Jenkins job
Just click on New Item, then select Maven project and give a new to the job.

After creating a job, need to configure it. Go to the job configuration. Then in Source Code Management section select Git and paste your repository clone URL. I rather go with HTTPS for public repos because no configuration required. From Branches to build you can specify which branch to build.
Now need to configure build process. Scroll down to Build section and type mvn verify in front of Goals and options.
The last step is to add the hook. Scroll up to Build Triggers and check GitHub hook trigger for GITScm polling.
Your overall configuration should look similar to below picture:
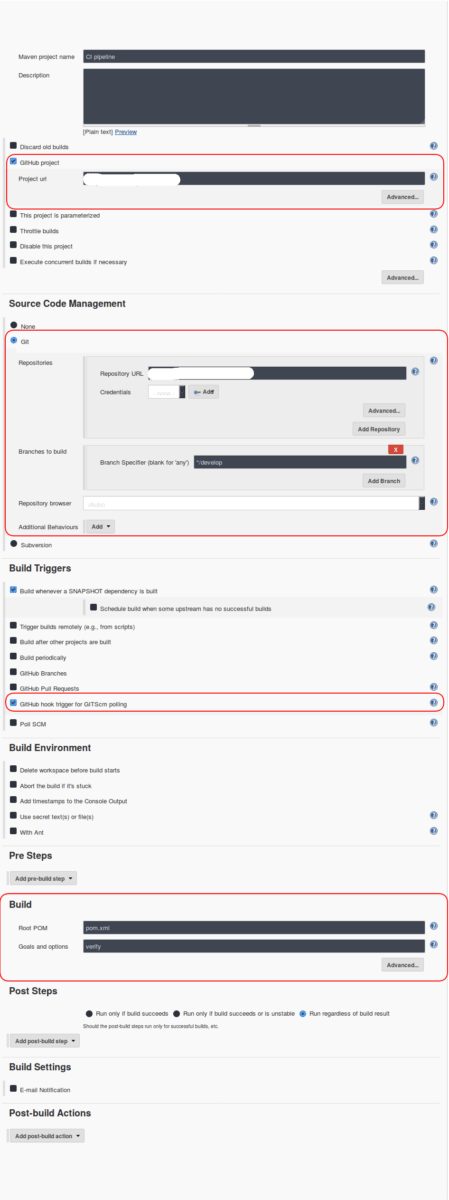
Then click Save and you are done with the configuration of the job.
Test the Jenkins job
Moment of truth 😉 Just go to the newly created job page and click Build Now. Wait until the process finishes and observe the result.
To test GitHub hook, just go back to Integration & service page and click on Test service. You should be able to see the log from GitHub Hook Log,

Congratulations you managed to configure a CI pipeline for your Maven project.


